Smart Clipping
ScreenSage Pro's Smart Clipping automatically detects silent segments in your video or audio (for example thinking pauses, breaths, or stretches where nobody is speaking and only background noise remains) and removes extra gaps while keeping natural pauses. By default it uses the blue Speech preset, which is tuned for most talking‑head and course recordings.
Recommended use cases:
- Talking‑head / knowledge‑sharing videos
- Interview / podcast recordings
- Meeting recordings and long sessions you want to turn into course‑style content
What does it help with?
Doing a manual "rough cut" pass just to delete silences can easily take 20–30 minutes. With Smart Clipping you can analyze and batch‑process those silences in a few seconds, dramatically shortening your prep time for editing.
Before auto trimming:
After auto trimming:
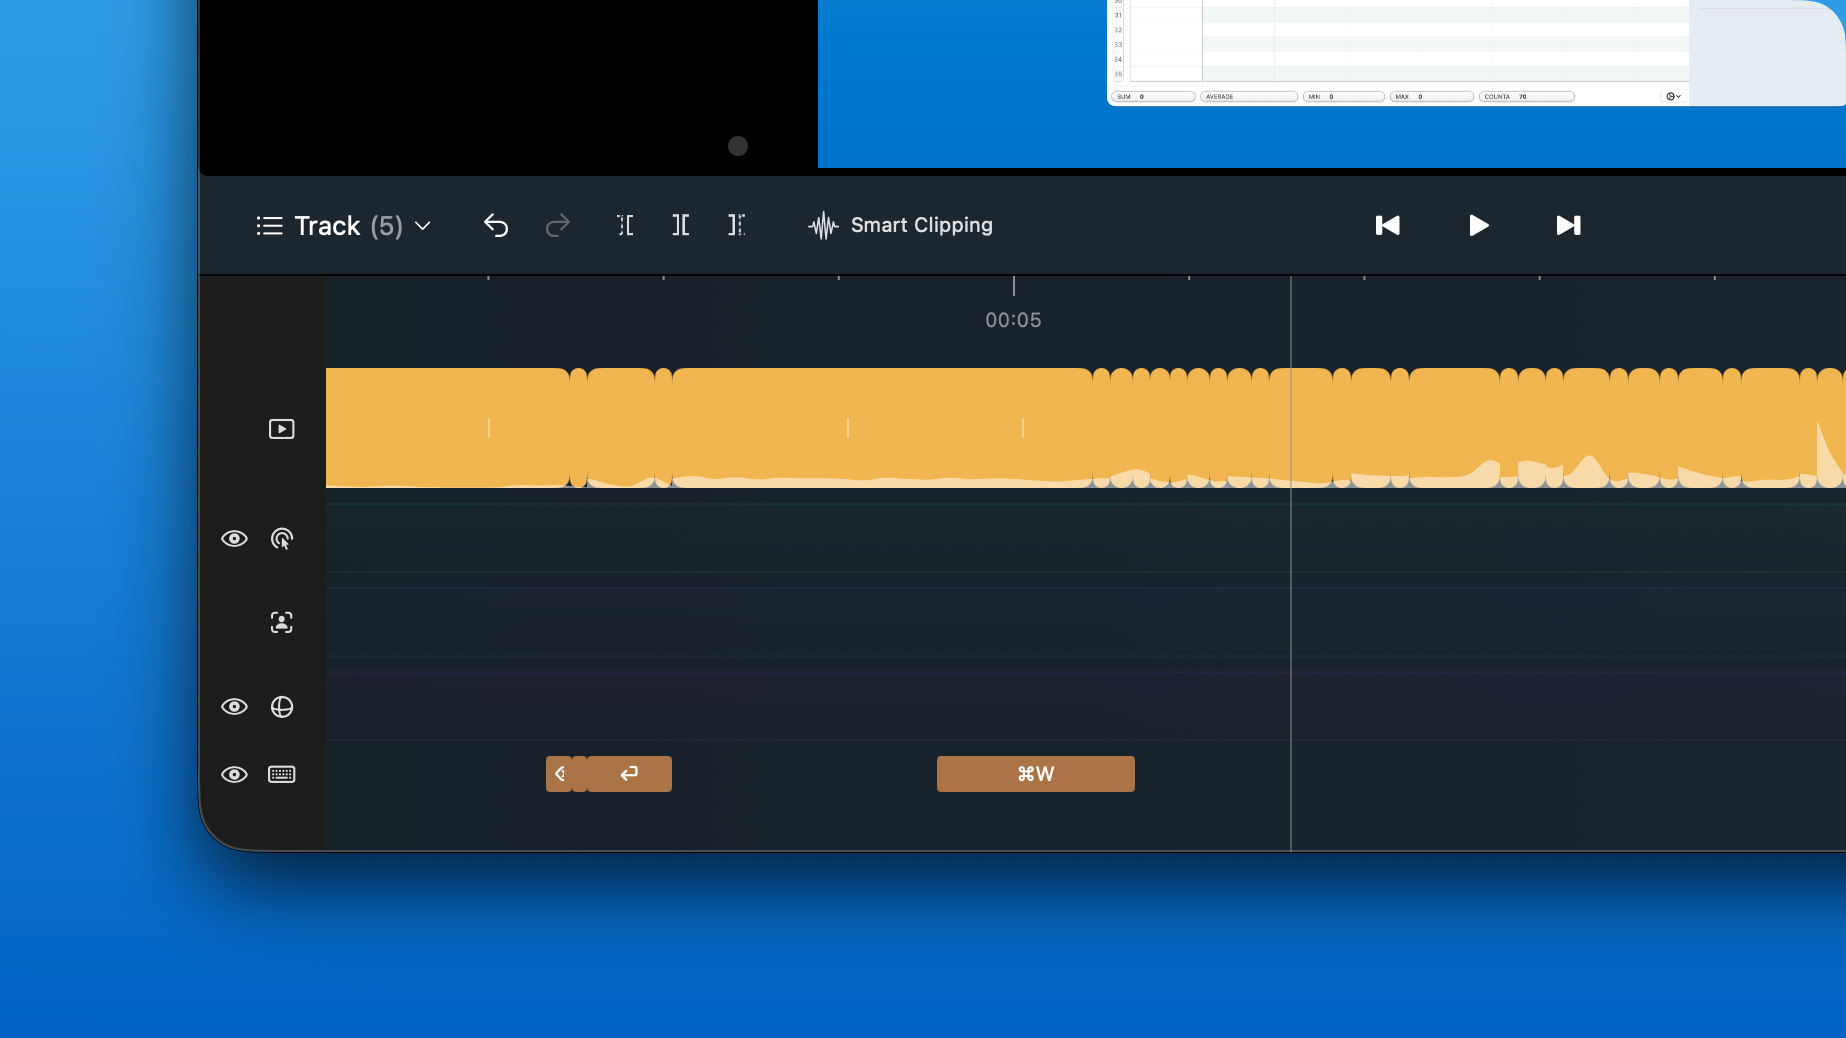
Open Smart Clipping Settings
On the timeline control bar, click Smart Clipping to open the Smart Clipping Settings panel.

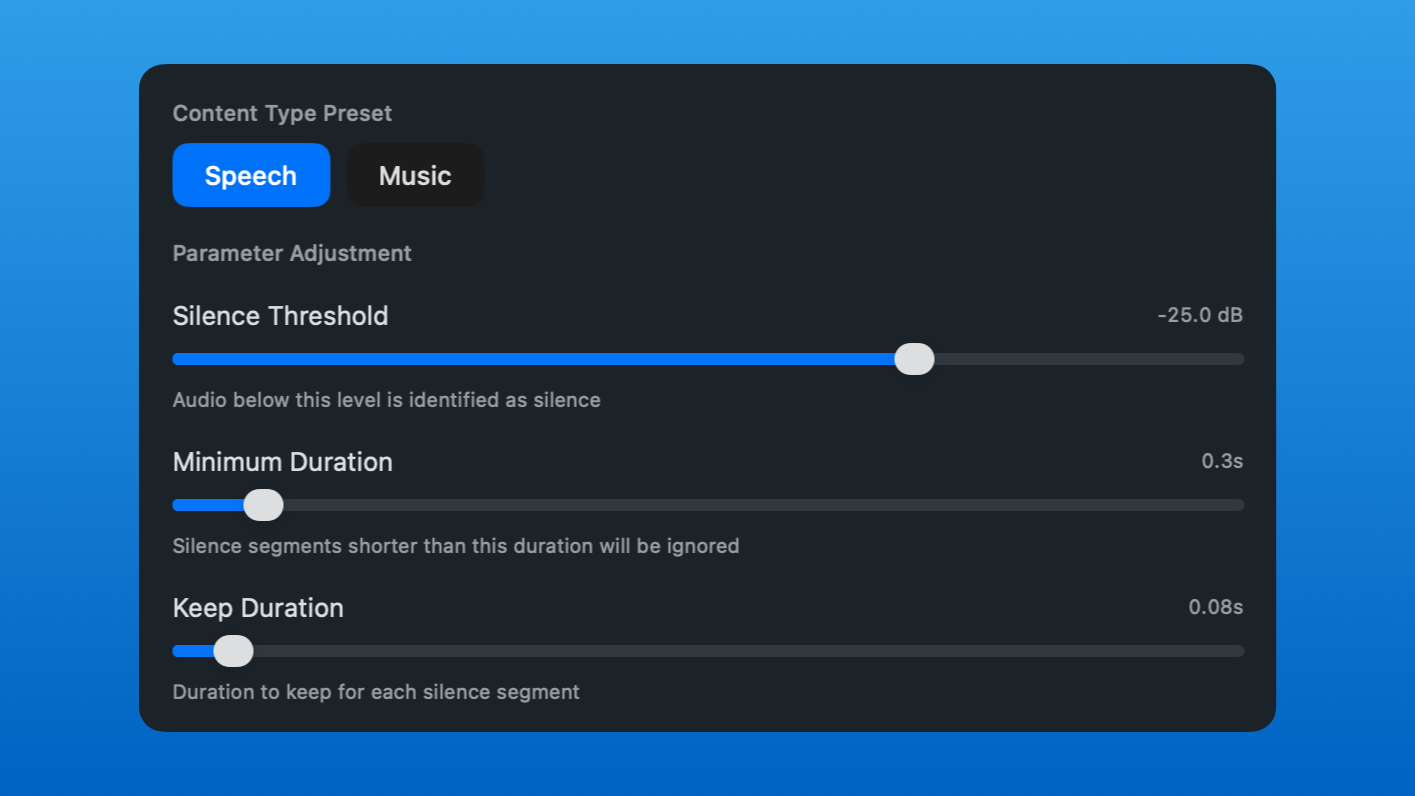
Choose a content preset
Use the Speech / Music tabs in the top‑left of the panel to tell Smart Clipping what type of material you are working with.
The blue Speech preset is selected by default and works best for voice‑over and dialogue; switching to Music automatically uses a smoother, music‑friendly silence detection profile.
Parameter guide: how to tune the three sliders
This middle section is where Smart Clipping really does its job, and also where many people feel unsure on first use. You can think of the three sliders as answering three questions:
- What should count as "silence"?
- How long does silence need to be before it is worth trimming?
- After trimming, how much gap should remain?
In the Parameter Adjustment section, the three sliders work like this:
-
Silence Threshold(sensitivity)
You can think of this as a "passing line". Audio quieter than this threshold is treated as silence; audio louder than it is treated as content to keep. The default is around-30.0 dB.- If your environment is noisy and the analysis keeps too much background hum or keyboard clicks, drag the slider to the right so the system is stricter;
- If you notice the tail ends of words or very soft speech getting cut, drag the slider to the left to make it more forgiving.
-
Minimum Duration(shortest silence length)
This defines "how long does a pause need to be before it counts as a pause". The default is0.5s.
With 0.5 seconds, typical 0.2‑second breathing pauses in normal speech are left untouched (so your rhythm stays natural). Only when you pause longer than 0.5 seconds will the system treat that section as removable silence. -
Keep Duration(buffer time)
This controls how much silence to leave over after trimming. The default is0.10s.
If you set it to 0, your audio becomes very tight, almost like a "machine‑gun" delivery where one sentence ends and the next starts immediately. We generally recommend keeping0.10–0.20sso there is a tiny gap between sentences and the speech feels natural.
Whenever you adjust a slider, Smart Clipping recalculates the silence list and the total time saved, so you can tweak settings and watch the numbers change.
Review the analysis and apply
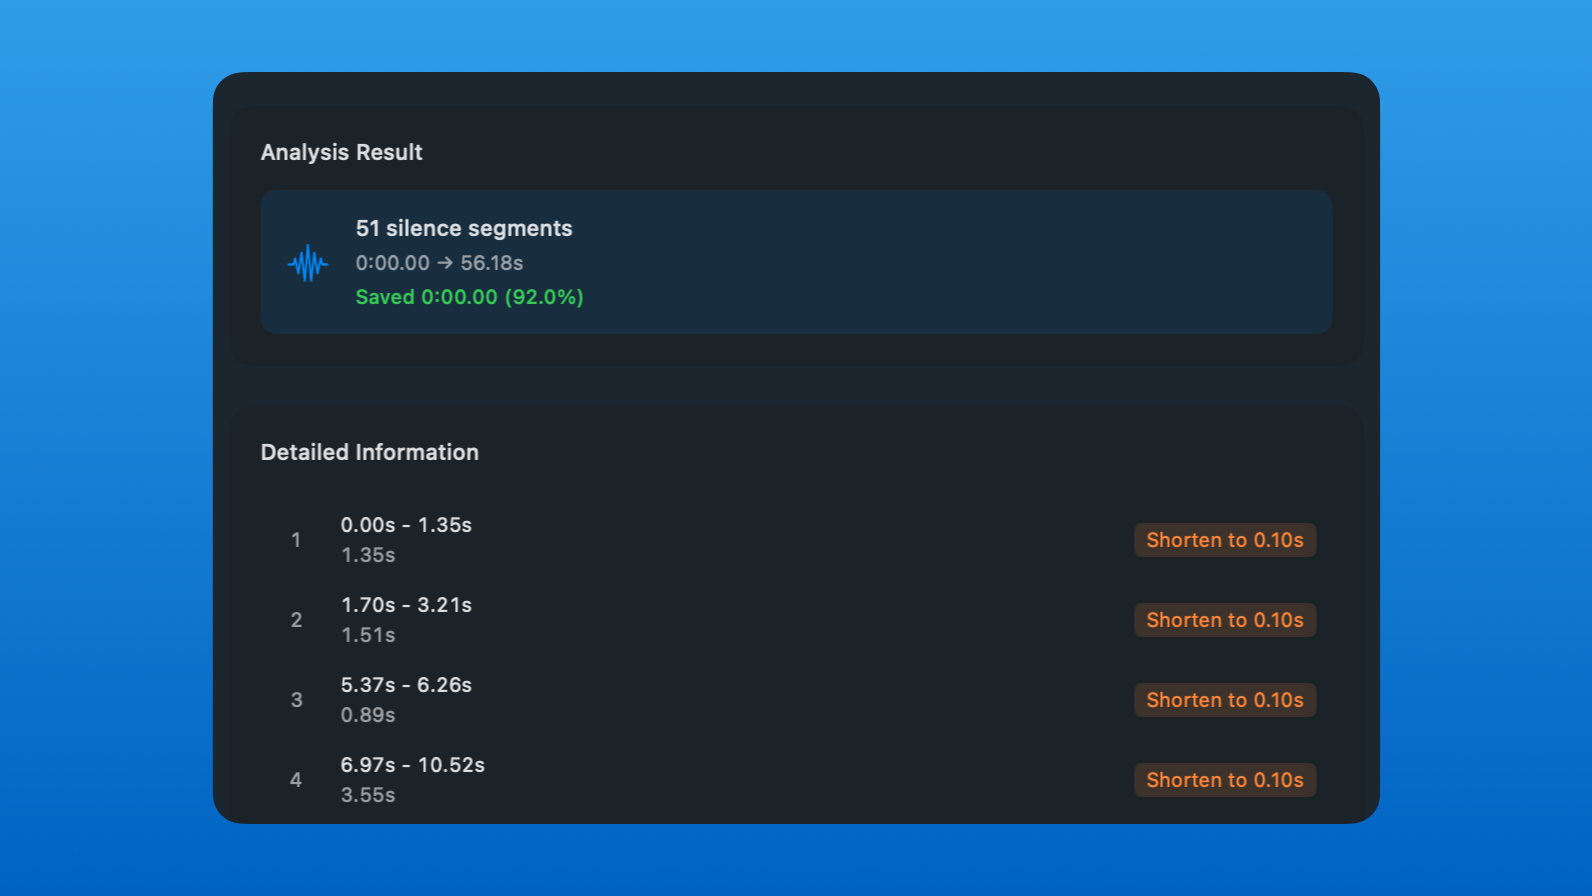
- In the
Analysis Resultcard at the bottom, review the number of detected silence segments, the total time saved, and the reduction percentage. - In the
Detailed Informationlist, inspect each silence segment with its start time, end time, and duration:- Check which pauses will be processed;
- Read the orange label on the right to see how each segment will be handled — for example,
Shorten to 0.10smeans only 0.10 seconds of silence will remain.
If you see pauses you want to keep, go back up, adjust the sliders, and clickRe-analyzeagain.
- Once you are happy with the result, click the blue
Apply Smart Clippingbutton in the bottom‑right to apply the current settings to the clips on your timeline. If you only wanted to test the settings and don’t want to commit the changes yet, clickCancelto close the panel.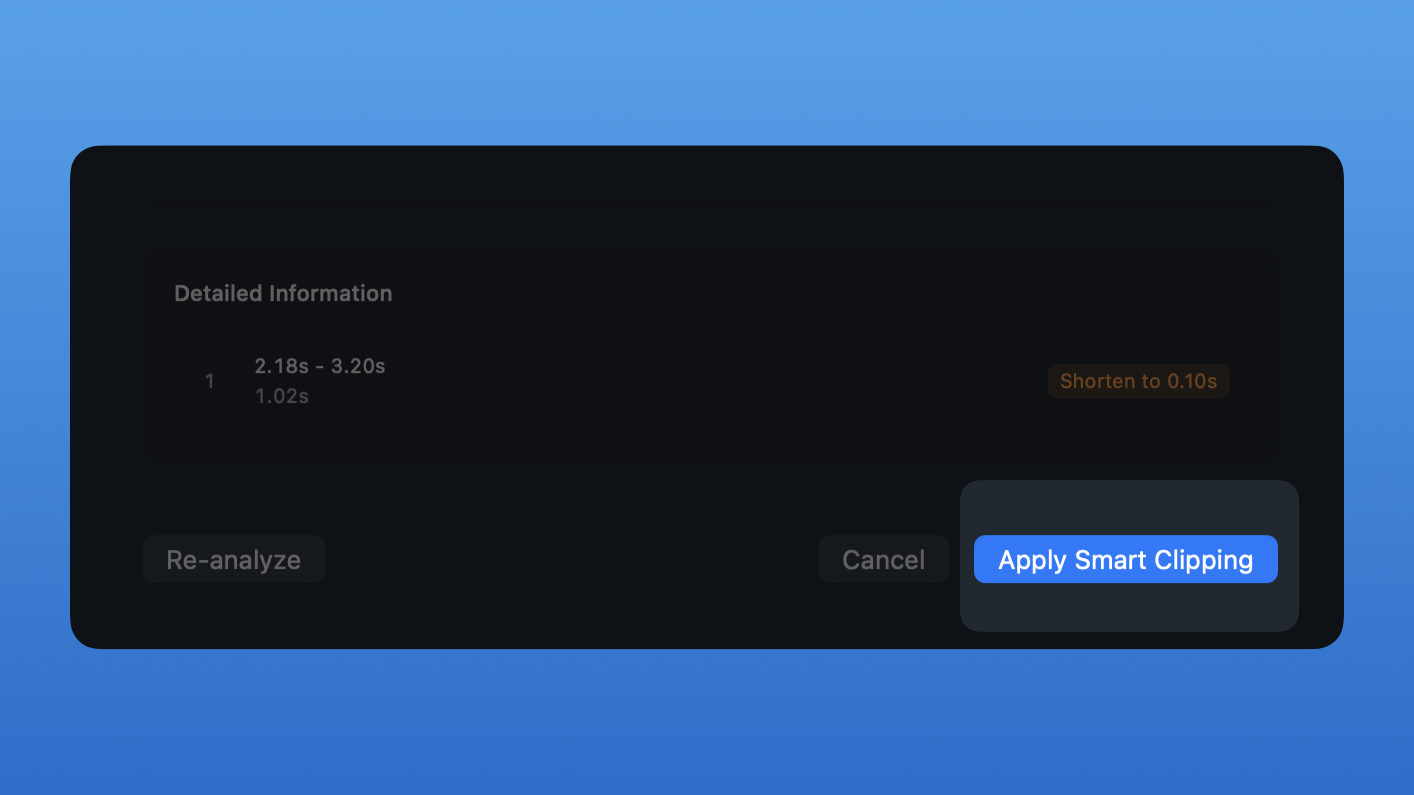
Check the result on the timeline
After applying the trim, you will see many new cuts added to the audio region on the timeline. Play it back once to make sure the pacing and pauses feel right.